After installing Windows 11, many users reportedly receive an error message, “Undoing changes made to your computer.”
The error message generally appears while installing an update. Worse, this process gets stuck in a loop and keeps repeating itself.
Fix ‘Undoing Changes Made to Your Computer’ In Windows 11
The ‘Undoing changes made to computer error’ is often accompanied by a BSOD error like 0x800f0922 or 0x800f0988. Below are the best methods to resolve the problem on Windows 11.
1. Run the Startup Repair Tool
Many Windows 11 users have claimed to resolve the ‘Undoing changes made to your computer’ error by running the startup repair tool. Maybe there’s a problem with the startup leading to the ‘Undoing Changes Made to Your Computer’ boot loop. Hence, you can try running the Startup Repair as well. Here’s what you need to do.
1. Force restart your Windows 11 computer. When the boot menu appears, press the ‘F8’ key.
2. In some computers, the keyboard shortcut to open the Recovery menu may differ. Try pressing Shift + F8, ESC, or F11 to see if these keys work.
3. When the Recovery screen appears, select Troubleshoot.
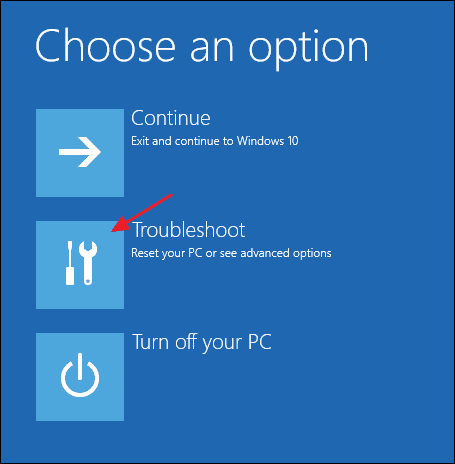
4. On the next screen, select Startup Repair.
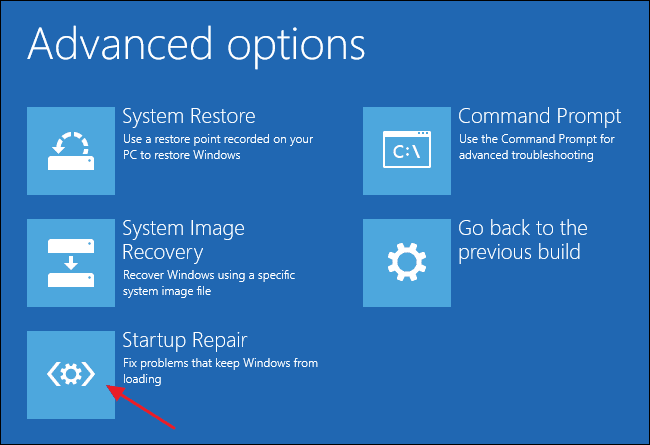

Your PC will restart, and the Startup Repair tool will run. Wait for the process to complete.
2. Uninstall the latest quality updates
Since Windows 11 is stuck installing a particular update, you need to remove it to resolve the issue. Here’s how to uninstall the latest Quality update.

1. First, wait 2-3 hours for the ‘Undoing changes made to your computer’ to complete. If nothing positive happens even after the long wait, you need to force shut down your PC.
2. After shutting down, press F8 during the boot screen to open the Recovery options. Some motherboards require you to press the ESC or F11 keys. You can even press the ‘Shift + F8’ key to boot into the Recovery screen.
3. On the Choose an option screen, select Troubleshoot.
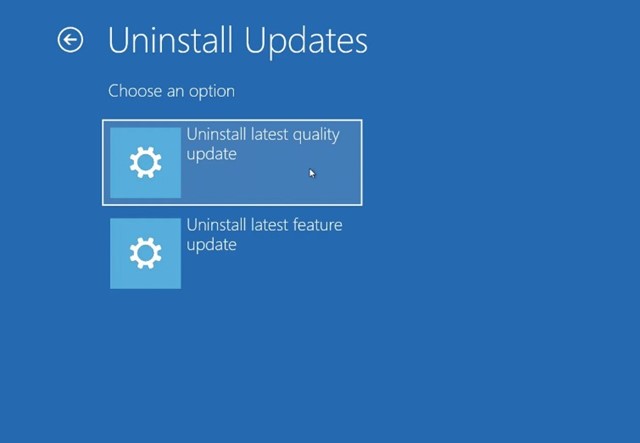
4. On the Advanced options, select Uninstall Updates.
5. Next, select the Uninstall latest quality update option.
Now, wait until Windows 11 uninstalls the latest quality update.
3. Change the Startup type for App Readiness
This method will help you fix ‘Undoing changes made to computer error’ if it’s accompanied by either the 0x800f0922 or 0x800f0988 error. Here’s what you need to do.
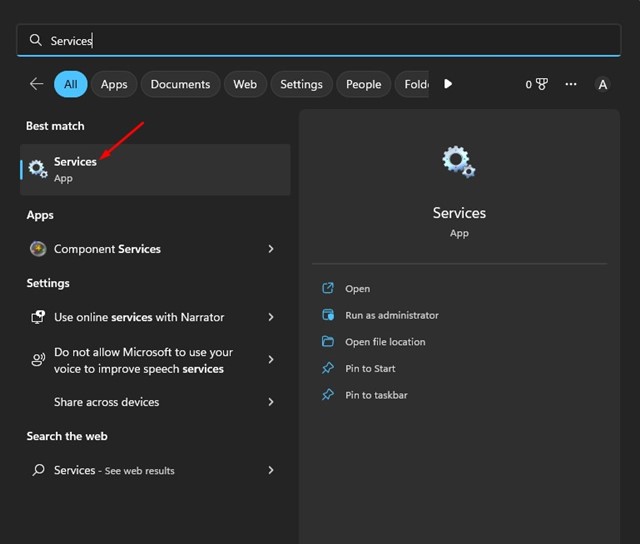
1. First, click on the Windows search and type Services. Next, open the Services app from the list of options.

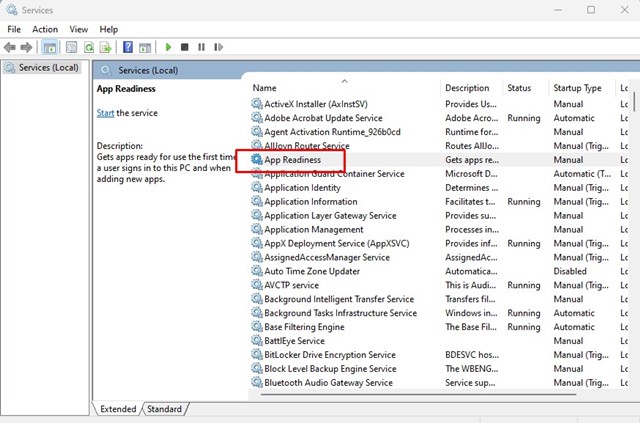
2. When the services app opens, scroll down and double-click on the App Readiness.

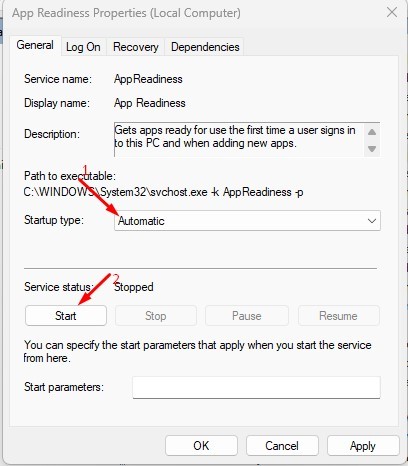
3. On the App Readiness Properties, select Automatic on the Startup type.
4. On the Services Status, click on Start (If available) and then click on the OK button.

Now, go ahead and update your Windows 11 from the Settings app.
4. Clean up the WinSxS folder
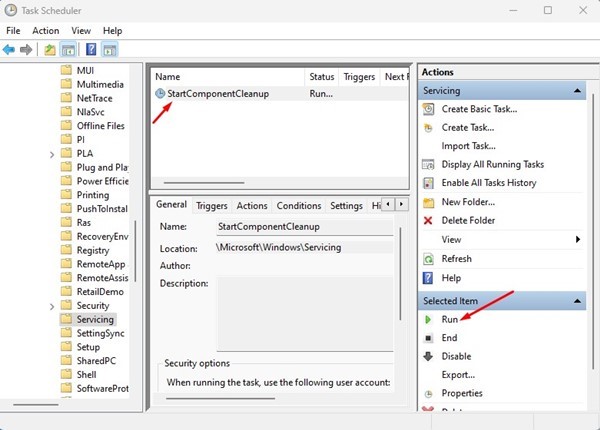

If you don’t know, Windows stores its recovery files, files needed to install updates, and previous versions of Windows components in the WinSxS folder.
This folder helps the operating system revert to the previous state in case of software failure. Hence, you need to clean up this folder to force Windows 11 to rebuild the files again.
There is not one but multiple ways to clean up the WinSxS folder in Windows 11. And we have already shared a detailed guide. Make sure to follow that guide to clean up the WinSxS folder.
5. Fix ‘Undoing Changes Made to Your Computer’ via CMD
In this method, we will use the Command Prompt utility to fix undoing changes made to your computer. Here are some of the simple steps you need to follow.
1. First, click on the Windows search and type in CMD. Right-click on the Command Prompt and select Run as administrator.
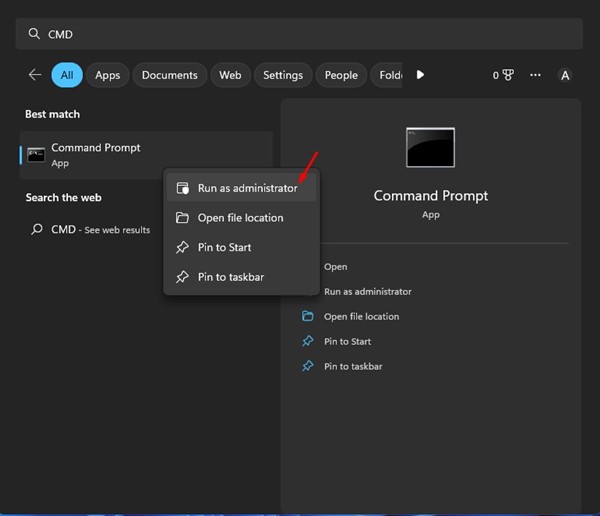

2. On the Command Prompt, execute all commands one by one.
net stop wuauservnet stop cryptSvcnet stop bitsnet stop msiserver
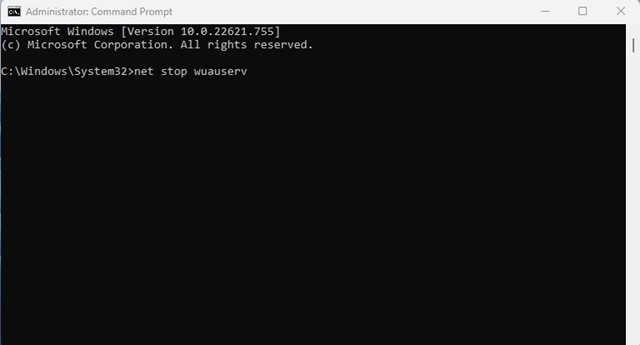

The commands will turn off the Windows update services.
3. After executing the above commands, you need to execute the below commands
Ren C:WindowsSoftwareDistribution SoftwareDistribution.old
Ren C:WindowsSystem32catroot2 Catroot2.old
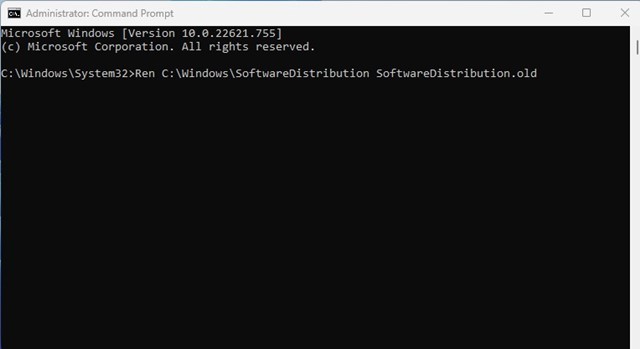

4. After executing the above commands, run these commands to restart the Windows Update services.
net start wuauserv
net start cryptSvc
net start bits
net start msiserver
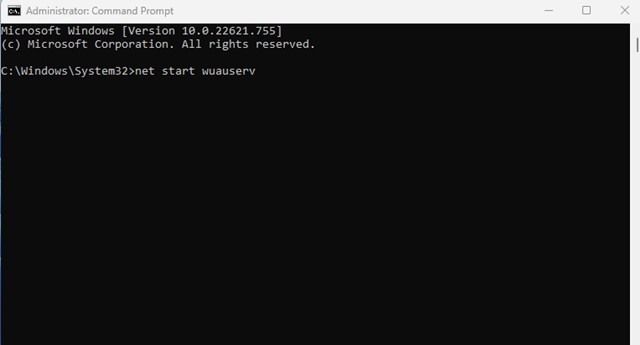

This may fix ‘Undoing changes made to computer error on your Windows 11.
6. Run the Windows Update Troubleshooter
In this method, we will run the Windows Update Troubleshooter to resolve the ‘Undoing changes made to computer’ error on Windows 11.
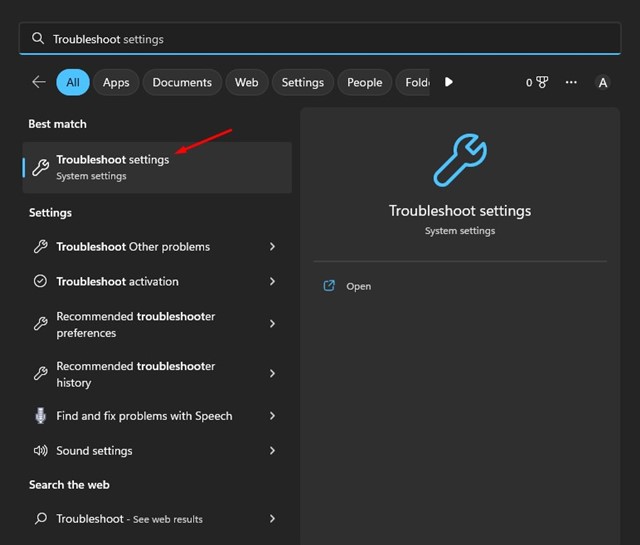
1. First, click on Windows search and type Troubleshoot. Next, open the Troubleshoot Settings from the list of available options.

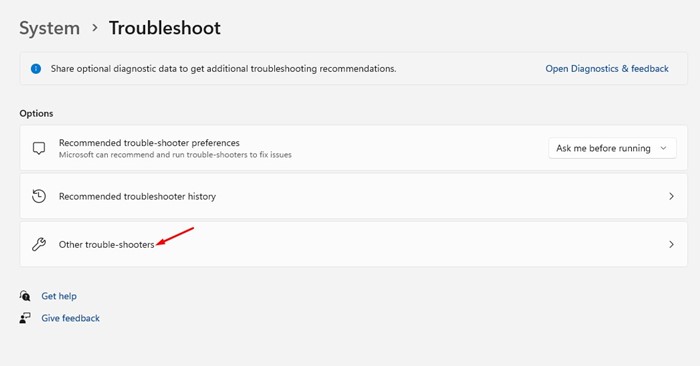
2. On the Troubleshoot screen, click on the Other trouble-shooters.

3. Now, find the Windows update and click the Run button beside it.
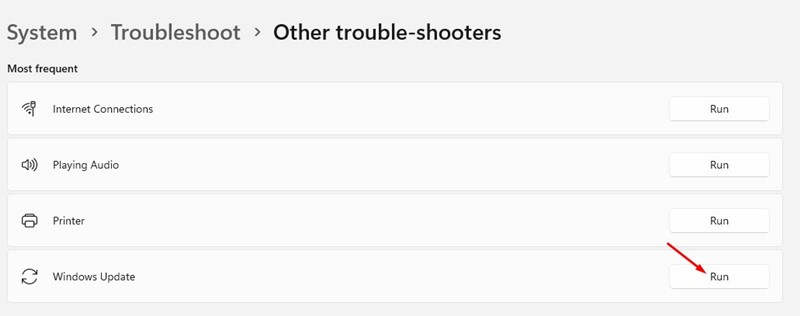

4. This will run the Windows Update troubleshooter.
You need to follow the on-screen instructions to complete the troubleshooting process.
7. Take the help of Windows Event Viewer
The Event Viewer keeps track of all errors. So, you can use Windows Event Viewer to find exactly what’s restricting your computer from installing the Windows 11 update.
When your PC gets stuck in the ‘Undoing changes made to computer’ error, remember to follow these steps.
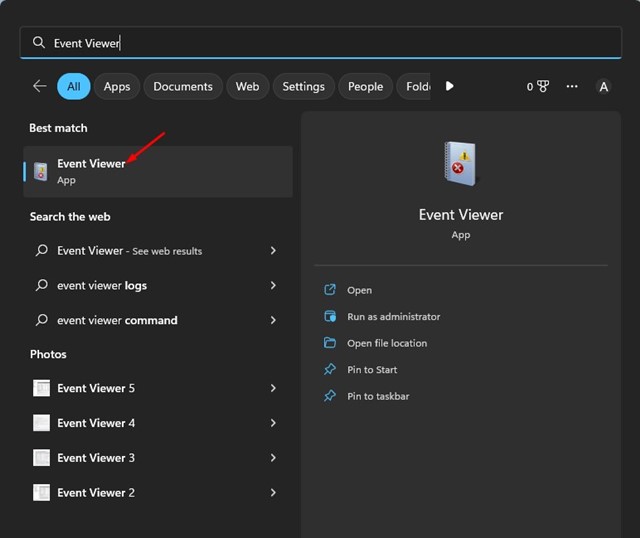
1. First, click on the Windows search and type Event Viewer. Next, open the Event Viewer app from the list of available options.

2. On the Event Viewer, navigate to the following path Windows Logs > Setup.
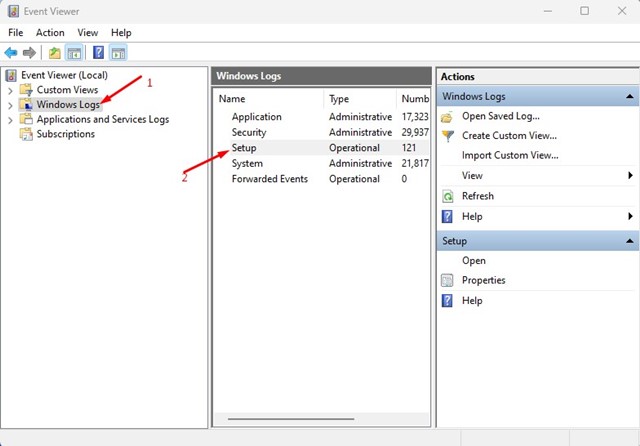

3. Now, under Setup, you will find all recorded events. You need to review the logs and check the date and time each event was recorded.
4. Once you find your timestamp, select it and check the actual cause under the General section.
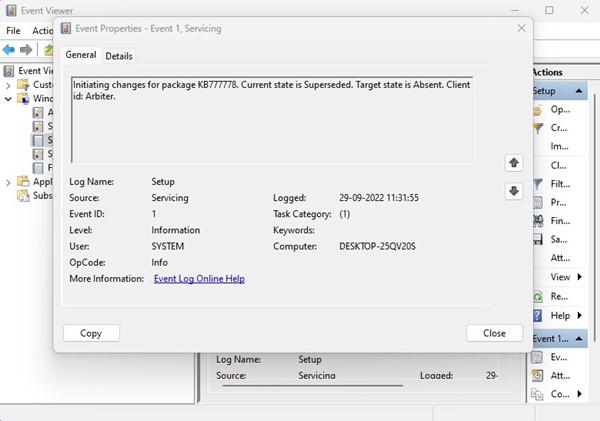

5. You must note the error code and search for it online to find a solution.
This is how you can fix ‘Undoing changes made to your computer’ using Event Viewer on Windows 11.
8. Run the SFC/DISM command
Sometimes, the undoing changes to your computer result from corrupted system files. Hence, you must run the SFC and DISM commands to resolve the issue. Here’s what you need to do.
1. First, click the Windows search box and type CMD. Next, right-click the Command Prompt and select Run as administrator.


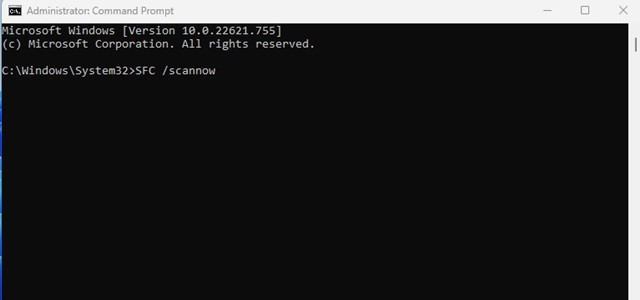
2. On the Command Prompt, run the SFC command:
SFC /scannow

3. If you get any error, then run the DISM command:
DISM /Online /Cleanup-Image /RestoreHealth
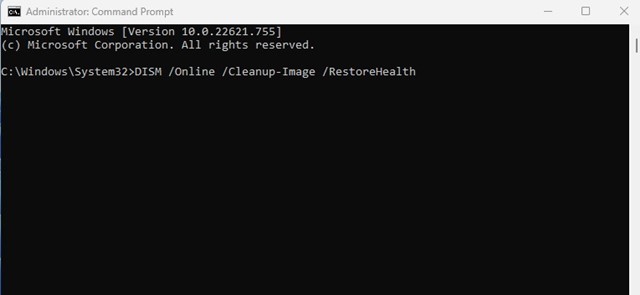

This is how you can run the SFC and DISM commands on Windows 11 to fix Windows stuck in installing updates.
9. Run the CHKDSK command
The CHKDSK command in Windows is meant to find and fix disk-related problems. If the disk drive you are installing the updates has a problem, you must fix it by running the CHKDSK command.
1. First, click the Windows search box and type CMD. Next, right-click the Command Prompt and select Run as administrator.


2. On the Command Prompt, run the CHKDSK command:
chkdsk /f
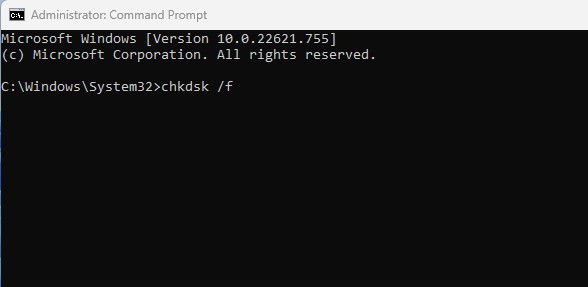

After executing the command, wait until the process completes. Once completed, restart your computer and attempt to install the Windows 11 update again.
10. Install Windows 11 Using Installation Assistant
If none of the methods managed to fix the Undoing changes made to your computer error, you need to download & install Windows 11 using the Installation Assistant.
This method for manually installing Windows 11 is a bit lengthy. We have shared a detailed guide on how to install Windows 11 via the Installation Assistant.
Read that guide and install Windows 11 with the installation Assistant. You will no longer encounter the ‘Undoing changes made to your computer’ error message.
There are other ways to install Windows 11, but the Installation Assistant one is the easiest. You can download & install Windows 11 Installation Assistant directly from Microsoft’s official website.
11. Manually Install the Windows 11 update
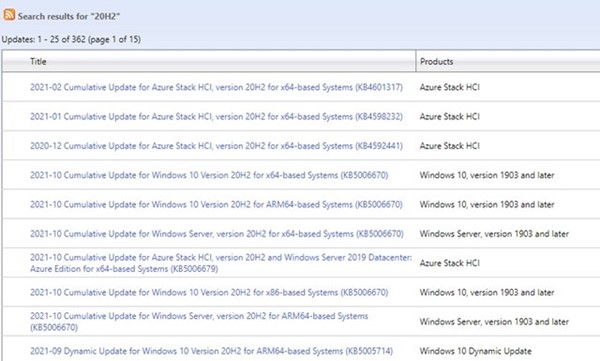

Since the ‘Undoing changes made to your computer’ appears when Windows 11 automatically installs the update, you can easily eliminate that error by installing updates manually.
It’s easy to install the Windows 11 updates manually; you need to use the Microsoft update catalog website.
We have already shared a full guide on how to download & install Windows updates Manually. So, you must follow the steps in the guide to manually install the problematic Windows 11 update.
12. Seek Help from Microsoft’s Forum
If the Undoing changes made to your computer still appear even after following all methods, you must raise a question in the Microsoft Forum.
Microsoft has a very active community forum where users can ask for solutions to various problems. In this case, you must ask questions in the Windows 11 section of Microsoft Forum and wait for genuine advice.
Meanwhile, you can check out what worked for others in fixing the Undoing changes made to your computer on Windows 11.
Frequently Asked Questions
How do I fix undoing changes on my computer
While Undoing changes made to the computer can be frustrating, you can follow our shared methods to resolve the issue. To fix it, you need to follow each method properly.
How long will it take undoing changes made to your computer?
Well, the Undoing Changes screen appears for several minutes. However, this message has a bad record of being stuck. If the process is stuck, it may take forever. So, if you feel that the process is stuck, follow the methods we have shared to get past this screen.
Why my laptop is undoing the update?
The Undoing the updates error screen usually appears when certain updates fail to install. Sometimes, it may appear due to startup issues, system file corruption, disk problems, etc.
What do I do if my laptop is stuck on the update screen?
If your laptop is stuck on the update screen, the first thing you can do is restart it using the reset button or power it off. Once powered off, press the power button again to turn it on.
What happens if I turn off computer while updating?
If you turn off the computer while updating, the next time you turn it on, you will see the Undoing changes Made to your computer screen. It’s also possible that the update process will resume soon after you power on.
These are some of the best methods to fix the Undoing changes made to your computer problem on Windows 10. We are sure these methods would have fixed the problem already. If you need more help fixing the Windows 11 error, let us know in the comments below.
